Showing posts with label sewing. Show all posts

Saturday, July 23, 2011

Wedding Gifts

My sister is getting married at the end of August. Unfortunately I can't attend and so I had to make the gifts I wanted to make and get them sent off. I knit this bread basket liner from 100% cotton. I was thinking of using linen and I found a linen/cotton blend but it could only be washed in 40 °C and the cotton in 60 °C. So I chose the cotton.

It's 192 rows long (including the cast on and bind off) and I knit a different wish into each row. The first being "May your bread always rise." and the last "May you cherish your new titles, husband and wife." Most of them I had to find from the internet as I couldn't come up with enough!

The second gift I made were two picnic placemats. They like to drive around and I thought that if they had to sit in the car to eat then they could use these on their laps. I had planned to either use the same pattern in different colours or different patterns in the same colours but I couldn't find any. Well I did find gingham styles but I thought I'd spend too much time on keeping the lines straight and with my horrible machine I didn't even want to think about it!

The napkin is folded and a third of it is inserted into the pocket. Then the cutlery is added.
The rest of the napkin is folded over the cutlery and slipped into the pocket.

After rolling the placemat up it is tied closed. If I went on picnics I'd make some for myself.

Friday, April 29, 2011

Flowered Drawstring Project Bag

I was Raked some material on Ravelry because I wanted to make myself a few project bags. This is the first one. The material is quite sturdy and it is for me, so I didn't bother to line it.

The selvedges were quite wide so I used them for the drawstring channel because they would match the cream colour from the material.

I sewed the top edge from the wrong side and then folded under the other raw edge and topstitched it. Error Error. Fortunately I took a break at this point and when I came back I realized that I couldn't sew the channels to the edge because they would then be closed off once I did the side seams.

So I took them both off and redid them further from the edge, zigzaging and folding the ends under.

I wanted French seams so I sewed the side seams with wrong sides together.

Then I turned the bag wrong side out and sewed the side seams again.

I wanted a bit of a flat bottom so I marked and sewed a triangle at the corners. Once that was done I folded down the top edge twice and sewed around it. All that was left to do was pull the cord through the channel.

Friday, February 18, 2011

Shirt Pocket

The pattern I'm using is from 1982 and the pocket they use is 14 X 16.5cm. It looked huge in the magazine picture. I found a smaller pocket from another pattern and used that.


I started by cutting out a cardboard piece the size of the pocket without the seam allowances as Peter suggests in his blog. I placed the cardboard template on the wrong side of the fabric and ironed the seam allowances over the edges of it. WARNING: be careful what kind of cardboard you use! I used a frozen pizza box and it stuck a bit to the fabric as I was pulling it off. Fortunately none of the writing came off but from now on I'll use something else.

I added the 2cm that was called for the upper edge but then realized that it would be too small if I wanted to fold it over twice. So my first hem was as small as I dared. I made the pocket a bit shorter so I could have a bit bigger hem for the top edge. With wrong sides together I stitched the top edge to the side seam. Then I turned it right side out and top stitched so the flap inside wouldn't flap around.

I liked the shape of this pocket. It was easy to fold around the cardboard template and easy to sew with straight edges and no curves. I'm not sure if it is in the right postition but once my son tries the shirt on he can decide himself where he wants it. And if he wants a pocket on the other side too and the shape of the pocket.

Wednesday, February 16, 2011

Attaching the Sleeves

I decided to attach the sleeves to the body by the method Peter shows at Male Pattern Boldness. With the sleeve face up, iron a hem. My seam allowance is 1.5cm so I folded it 6mm. With right sides facing together pin the fold to the raw edge of the armhole. Check that the placket will be at the back of the shirt. My pattern didn't have any notches to match so I just folded the sleeve in half to find the middle and kind of just pinned it around. Starting from the middle I sewed out to the the end of the armhole with a 9mm seam and then did the same with the other half.

Open the folded edge and refold it over the raw edges.

Pin the edge down. (Yes I know I use a lot of pins but with bad eyesight and winter sunlight I'd rather do as little unpicking as possible.)

On the wrong side topstitch close to the loose edge. I sewed from one end to the other. When I come to a thicker part I use this handy bump helper first before the bump and then after it.

First sleeve done.

Sunday, February 13, 2011

Continuous Sleeve Placket

The pattern I'm using has a continuous sleeve placket. It is a rectangular piece of material that is twice the length of the vent. Unfortunately the pattern gave the length for the shorter sleeve and I didn't think to check and so I had to cut out new ones. To start with, draw the cutting line on the sleeve. Then about 6mm from the bottom edge of that line reinforce the vent slash by sewing with a shorter stitch length up to the point of the slash line. Turn the material around and sew down to the edge again. Cut up to the point along the slash line without cutting through the sewing line.

Iron the placket in half lengthwise. Open it and fold one edge close to the middle and iron this fold.
Unfold the placket, spread open the sleeve vent and pin the uncreased right side to the right side of the sleeve. The middle point of the sleeve edge needs to be about 8-9mm away from the edge of the placket. (I have a piece of black thread along the edge of sleeve to show that the edges don't meet.) Sew the seam allowance distance from the edge of the placket piece. Once you get to the middle it will be tricky because there is too much material to lay flat. I tried googling how to avoid this but wasn't able to find any answer. So I just did the best I could.

Iron the seam allowance towards the placket piece. Pull the placket piece around to the wrong side of the sleeve and turn the prefolded edge under and pin down. Top stitch, being careful to hide the other seam. With right sides together, fold the placket in half and sew a short diagonal seam at the top.


Not too difficult and turned out ok for the muslin. I might try different plackets to see if I like something else better.

I used the spell check and it high-lighted almost everything! I'll try again tomorrow.

Friday, February 11, 2011

Yoking Around

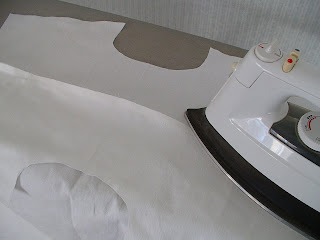
I finally gave up fiddling with the shirt pattern because other people in MPB Men's Shirt Sew-Along over on Peter's blog have already got their muslin finished. So I pinned some of the pattern pieces to an old sheet I bought from a charity store to use as a muslin. I've only cut out the two yoke pieces, the two front pieces and the back. I'll do the rest later. I might not even do the collar until my son has a chance to try the muslin on so I can see if the neck opening is the right size and at the correct height.

I started by pinning (the green pin) and then basting the pleats on the back piece. Then I put the back piece between the two (wrong sides out) yoke pieces and sewed through the three layers. I read somewhere that you should press all of your seams on both sides before moving on to the next step, so that is what I'm going to do.

Next was ironing to turn the seam allowance towards the yoke. I turned the whole thing over and ironed the other side the same way. After that I put both yoke pieces wrong sides together and ironed them from the outside. I decided to do the top-stitching on the yoke now because there wasn't as much material to move around. As this is the muslin I did the row of top-stitching and didn't bother to look where it should be. I just went and checked four of my son's store-bought shirts and the top-stitching on them is right at the edge and I did it 7 mm away! Oh well.

There is a way of finishing the shirt yoke called the burrito. I tried to look at it from people's blogs because I wasn't getting it. The pattern I'm using doesn't have a separate piece for the button 'placket' (is it then a placket?) so I didn't have to worry about that. The way I did it was to have the wrong sides of the front and back pieces facing and pin them together. Opening up the two yoke pieces I laid the wrong sides of the yokes down on the table.

Then I took the back piece and rolled it up and laid it on the yoke piece that was already pinned. I did the same to the front piece so that the pins were laying on the table.

I brought the unpinned yoke edge up and over the rolled pieces to meet with the pinned edges and pinned it to them. I sewed the seam, ironed it and repeated the steps with the other front piece.

Everything was turned right side out, ironed and I'll top-stitched close to the edge when there's daylight again!

Oops. I just read on Peter's blog that you should start by stay-stitching the neckline. I've done it now.

Sunday, February 6, 2011

Done and Over With


The sleeves turned out well even though they were 1 cm longer than we thought would be necessary. It was nice seeing long enough sleeves on my son! I made a mistake with narrowing the sides and didn't narrow them enough. Fortunately! I thought that the shirt was too tight in one place and I don't know if he would have been able to wear it if I had narrowed it as much as planned.

Now that the shirt sleeves were long enough my son noticed that the suit jacket sleeves could be longer. But that will keep until he needs the suit again. Hopefully that won't be for years. And the shoulders are too wide, and the ....

Monday, January 31, 2011

Suit Shirt

My son is tall and has long arms so most shirt sleeves are too short for him. He's attending a funeral next weekend and when he was home last weekend he tried on the only plain white shirt he has. The sleeves were quite short and he would have liked them showing out of the suit sleeve. So I suggested that I just add some material on to each sleeve. He wouldn't be taking his suit jacket off and no one would know.


I remembered that I had cut a sleeve off of another white shirt to make it into a short-sleeved shirt. I never finished it but I thought that I could use the sleeve material for the extension piece. Unfortunately the sleeves are different widths so I had to cut the suit shirt just above the sleeve placket to get the same width. Then came the problem of how to attach the lower edge to the new piece because they were different widths too. I decided to try the upper edge first to see if it worked before figuring out the lower one. I put the cuff piece inside the sleeve so I could sew the wrong sides together as I wanted to make a flat-felled seam. Then I pulled the cuff piece out so I could iron the new seam to have it easier to trim one of the edges before turning the other one over it.

I was trimming away when it hit me. Duh! Why not just use the the other cuff piece as the cuff piece for the suit shirt and I wouldn't have to fuss with getting the lower edges to match. I'll have to wait to see what my son says but other than switching the buttons if he wants, I don't see that it will matter. (Ok the shirt is flat-felled seamed and the cuff piece serged but who's going to peek in his jacket sleeve?) The sleeve is now 9 cm longer.

Next is trying to narrow the shirt. Sigh.

Saturday, January 22, 2011

Shirtmaking

For a few years I've been saying to my son that I should make him a shirt as his arms are too long for store-bought ones and he's so thin. I tend to put off sewing because of my machine, but I need to get started. I've wanted my own pattern, so I'd have the directions and photo too and I finally found one in a Suuri Käsityö Kerho magazine from the recycling center. It's from 1982 though, so I hope it will do.

I started by finding the pieces on the pattern page and writing the numbers on the edge so that they would be easier to find again. I've traced all of the pieces out. I couldn't remember what langansuunta was in English so I just put a T (for thread) everywhere it was written and waited until I had the computer on to look what it was. Grainline of course! Tomorrow's task is to take my son's measurements and compare them to the pattern pieces to see what needs to be changed. I don't know if I'll be able to change them very well but I hope so.

I just sent off my request to Peter at Male Pattern Boldness for an invite to the MPB Men's Shirt Sew-Along. So hopefully seeing all of the other shirts will inspire me.

Today's Question: Do you have any shirt making tips?

Tuesday, November 9, 2010

Candy Roll


When my son was younger I would get him a chocolate advent calendar but as he grew the amount of chocolate for each day seemed so small. So I crocheted a candy holder and put a candy or chocolate in each pocket. Then he grew older still and for a few years I bought enough licorice and small chocolate bars to hang on a bulletin board. The first year I wrapped them in newspaper photos that I had saved up but then we decided that it wasn't necessary to wrap them so I just thumb-tacked them onto the board.


He has moved out but I still asked him this year if he wanted me to put something together for him and he did. I had to get it ready in time for him to take it back with him last weekend because we don't know if he'll be home again before December. I thought of a crayon roll and decided to only make 20 pockets so that wider things could fit in if he wants to use it for something else too. Some of the pockets have more than one treat in them. It isn't too easy anymore finding 25 different small things. I wonder if he will save them until December!

I'm linking this to

Tuesday, October 12, 2010

Ginger Snaps

I can't remember did we eat ginger snaps when I was growing up or did I find them after I moved out on my own. Every few years they pop in my mind (as do Fig Newtons, Cheez Whiz, etc.) and I miss them. I came across a Ginger Snap recipe from a Canadian blog and thought that I would try them. They were really good but not like the ones I used to eat. Next time I will try adding more ginger and less sugar and see how that turns out.

After I finished making the project bags I was left with the corners that I had cut out. I've been wanting a few mug coasters and I thought that I would try to use the scraps to make them.

First I cut off the rounded edges and sewed four of the squares together.

I wanted some padding but not so much that the mugs might tip over. I had no use for the rounded bits so I used them by placing them away from the seams as not to add more bulk.

Then I sewed two of the pieces together and turned them right side out and sewed in a spiral to keep the padding in place. They are just for me so I wasn't too careful how straight the edges or lines were. All that was left from the original piece of material were small scraps and I didn't feel bad bad throwing them away.

Friday, September 24, 2010

Slow Work

I don't know any bloggers. Well I did know one, but she doesn't blog anymore. So I've never asked anyone how they check on the blogs that they read. I've been using Bloglines but it is shutting down next month. I had to find a new place to put all of the blogs I want to keep up on. At the moment I'm using Google Reader because I haven't looked into any others yet. It's possible to move them all at once but with over 330 blogs on Bloglines (and over 9000 unread posts) I want to go through them all. I think it would be better to only move the ones that I'm sure that include my interests at the moment. OK, and a lot of other ones too!

I had been thinking of going through them for awhile (after I noticed that there were over 9000 unread posts) and now I have to do it. It was interesting to find that some of the blogs no longer existed even though I could read the posts that Bloglines hadn't marked as read. Some had changed their site address and I didn't know. I still have 88 blogs to look through. I was hoping to cut the total down to 100 blogs but I've already moved 140!


When my son visited last time I was able to make GrannyG's Caramel Slice with the condensed milk that GrannyG sent me. It was a real treat. I still have another tin, so I have to decide whether or not to make these again or try something different.


I haven't been making many of Carla's test recipes lately. During the summer it was too hot and now, living on my own, I'm too lazy. I did make her Savory Sunflower Brittle recently because it sounded so unusual and I plan to make it again soon.


I've done a bit of sewing. Some people on Ravelry have asked for project bags though they probably would want something more modern. I had this piece of material that I was pretty sure I'd never use. It wasn't a big piece and the squares were too large for any quilting I might want to do. I've sent three off and still should get the last one sent.

Monday, July 12, 2010

Summer Heat is Here

I wasn't sure if we'd get a proper summer but it's 29 ºC in this room!

I went to the recycling center last week and found this cute mug. I definitely don't need more mugs but it was so cute I couldn't resist (and it was only 0.20 €). I tried out a No Pudge Brownie Clone recipe, using soy vanilla yogurt instead of fat-free yogurt and half white and half brown sugar and less than called for. Not bad for what they were and quite simple.


Last year I bought these pants from the charity store for my son. I knew that they were too short but I thought that he might like capris (are they called that for men too?) but he didn't. I was going to get rid of them and asked him again to make sure if he wanted me to shorten them for him. He suggested that I make them into shorts. So I did. He hasn't tried them on yet so I hope they are a good length.